
Rocks, Minerals, and Field Identification
Build a practical field vocabulary and learn the tests that separate look-alike rocks and minerals.
By the end of this module
- Separate rocks from minerals
- Identify the three rock families
- Use hardness, streak, cleavage, acid, magnetism, and heft
You’re crouched on a gravel bar on Clear Creek, and something in the pan just winked at you. Gold? Pyrite? A flake of mica catching the sun the wrong way? You have about ten seconds before the excitement makes you sloppy. This module is about buying yourself those ten seconds back — a quick, repeatable set of field tests that separate “maybe” from “yes” without a lab, a jeweler, or a Wi-Fi signal.
Every rock and mineral you’ll ever pick up in Colorado sorts into a small number of families and responds to a handful of physical tests. Learn the tests once, and you’ll use them on every trip for the rest of your prospecting life.
Rocks vs. Minerals — Get the Vocabulary Straight
A mineral is a naturally occurring, inorganic solid with a defined chemical composition and crystal structure — quartz, feldspar, calcite, pyrite, gold.
A rock is an aggregate of one or more minerals (or mineral-like material, such as volcanic glass) — granite is a rock made of quartz, feldspar, and mica crystals locked together.
Prospectors deal with both: you identify individual minerals (is this gold or pyrite?) and you read rocks as a whole (is this the granite that belongs here, or a piece of quartz vein float that traveled from somewhere upslope?).
The Three Rock Families
Every rock in Colorado — from the Precambrian core of the Front Range to a fresh boulder in a debris flow — belongs to one of three families.
| Family | How it forms | Field look | Colorado examples |
|---|---|---|---|
| Igneous | Crystallized from molten rock (magma or lava) | Intrusive/plutonic: coarse, visible crystals (slow cooling underground). Extrusive/volcanic: fine-grained or glassy (fast cooling at the surface) | Granite (Pikes Peak), basalt, rhyolite, obsidian |
| Sedimentary | Compacted and cemented sediment, or precipitated minerals | Often layered (bedding), sometimes fossiliferous; clastic (sandstone, shale, conglomerate) or chemical (limestone, evaporites) | Sandstone and shale of the Front Range foothills, limestone in the Leadville area |
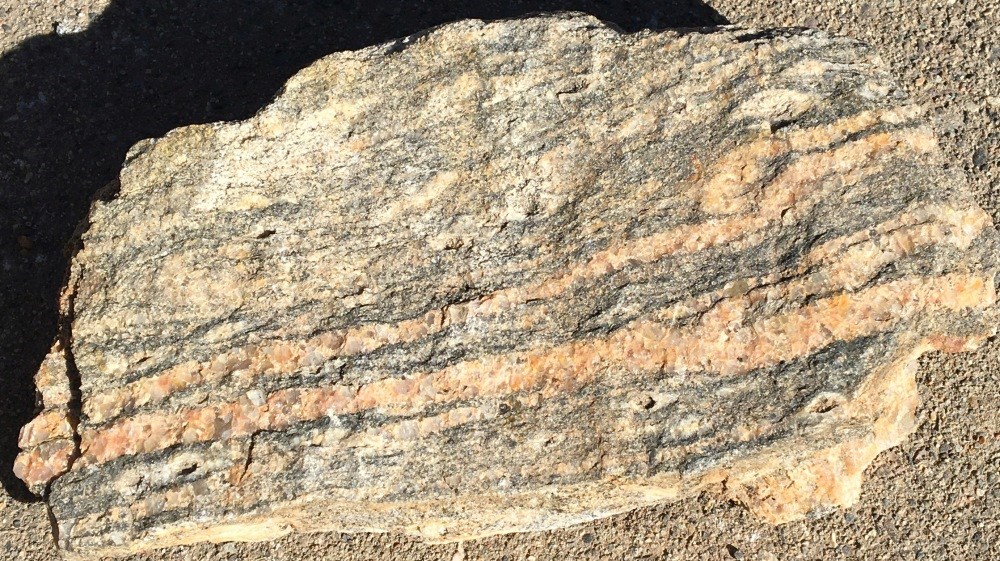
| Metamorphic | Pre-existing rock altered by heat and/or pressure without melting | Foliated (banded) or recrystallized texture | Schist, gneiss, quartzite, marble — common in the Precambrian basement |
Knowing the family narrows your expectations fast. See banding and mica flash on a hillside outcrop? You’re probably looking at metamorphic basement rock — the kind of terrain that hosts many of Colorado’s historic hardrock districts. See fine layering with possible fossils? You’re in sedimentary country, a different exploration picture entirely.
Seven Field Tests That Actually Work
You don’t need a laboratory. You need these seven tests, done in a consistent order, every time.
1. Hardness (the Mohs scratch test)
The Mohs scale runs 1 (softest) to 10 (hardest). A mineral scratches anything softer than itself and gets scratched by anything harder. You carry your reference scale in your pocket already:
| Reference | Approx. Mohs hardness |
|---|---|
| Fingernail | ~2.5 |
| Copper penny | ~3.5 |
| Knife blade / steel nail | ~5.5 |
| Glass / streak plate | ~6.5 |
| Steel file | ~7 |
Talc (hardness 1) is scratched by a fingernail with zero effort and feels soapy between your fingers. Orthoclase feldspar (hardness 6) scratches glass with some effort and shows two cleavage directions at roughly 90 degrees. Run the scratch test on an unweathered, fresh surface — a weathered rind will give you a false (usually softer) reading (Mohs Hardness Scale Field Guide).
2. Streak
Rub the specimen firmly across an unglazed porcelain plate (the back of a bathroom tile works if you’re desperate). The color of the powdered residue — the streak — is often far more diagnostic than the surface color, because surface color can shift with impurities and tarnish while the streak stays consistent (DIY Mineral ID Kit, University of Kansas). This is your single best tool for the gold-vs-pyrite question below.
3. Cleavage and fracture
Cleavage is how a mineral breaks along internal planes of weakness — described by the number of directions and the angles between them. Fracture is irregular breakage with no planes, such as the smooth, curved conchoidal fracture you see in quartz and obsidian. Learning to tell “this broke along a flat plane” from “this broke into a curved chip” takes practice but is free and fast.
4. Acid reaction
A drop of dilute (5–10%) hydrochloric acid fizzes on calcite and limestone (calcium carbonate) but not on dolomite unless it’s powdered first, and not on most silicate rocks. This is your go-to test for distinguishing carbonate rock — and, later in this course, for spotting caliche in soil profiles.
5. Magnetism
A small magnet (or a magnetic streak plate) will grab magnetite directly and stick weakly to some iron-altered rocks. Useful shorthand in mineral-belt exploration, where iron oxide staining often flags a broader hydrothermal system worth a closer look.
6. Density / specific gravity — the “heft” test
Pick up two rocks of similar size and feel which one is unreasonably heavy for its volume. This isn’t precision science, but it’s the entire physical basis of placer prospecting: gold’s specific gravity is roughly 19, compared to about 2.5–3.5 for the common rock-forming minerals sharing your pan. That enormous density gap is why panning, sluicing, and dredging all work — you’re using gravity and water to exploit exactly this difference.
7. Luster
Metallic (looks like polished metal) versus non-metallic (glassy/vitreous, pearly, earthy, silky, resinous). It’s your fastest first-pass clue, but luster alone never closes the case — which brings us to the test everyone eventually needs.
Myth Check: “Shiny and Yellow” Is Not Gold ID
Pyrite ("fool’s gold") and mica flakes fool beginners constantly, and honestly, they fool experienced folks having an optimistic day, too. Color alone proves nothing. Here’s the real discriminator table:
| Test | Gold | Pyrite | Mica |
|---|---|---|---|
| Streak | Gold-yellow, metallic | Greenish-black | Pale, often none visible |
| Hardness | ~2.5–3 (soft) | ~6–6.5 (hard, brittle) | ~2–3 (soft, but flexes) |
| Behavior under pressure | Malleable — dents or flattens | Brittle — shatters into small cubic fragments | Splits into thin, flexible sheets |
| Specific gravity | Very high (~19) | Moderate (~5) | Low (~2.8) |
If it flattens under a knife point instead of shattering, and leaves a gold streak, you’re getting warmer. If it shatters or leaves a dark streak, it’s not gold — no matter how good it looked in the sun.
Building a Field ID Kit
You can assemble a complete field identification kit for well under the cost of a nice dinner out:
- [ ] Hand lens (10x loupe)
- [ ] Mohs reference set, or the pocket substitutes above (fingernail, penny, glass, knife, file)
- [ ] Unglazed porcelain streak plate
- [ ] Dilute HCl in a dropper bottle (with basic eye protection — treat it as a minor chemical hazard even dilute)
- [ ] Small magnet
- [ ] Field notebook
- [ ] Basic rock pick or chisel
Common Mistakes
- Testing a weathered surface instead of a fresh break. Weathering rinds give false-soft hardness readings and disguise true color and luster.
- Relying on color alone. Covered above — it’s the single most common beginner error in the entire hobby.
- Skipping the streak test because “it looks obvious." The specimens that look most obvious are exactly the ones worth double-checking.
- Using a wet or dirty streak plate. Clean the plate between tests or you’ll contaminate your reading with the previous specimen’s powder.
- Forgetting cleavage angles. Two minerals can look nearly identical until you check whether they break at 90 degrees or some other angle.
Field Exercise
Collect three unknown specimens from a gravel bar, roadcut, or your own backyard. For each one, fill out this table in your field notebook:
| Specimen | Luster | Streak color | Hardness (relative) | Acid reaction (Y/N) | Magnetic (Y/N) | Best guess ID |
|---|---|---|---|---|---|---|
| 1 | ||||||
| 2 | ||||||
| 3 |
Do all seven tests in order before you commit to an ID. Resist the urge to stop after the first promising result — that’s how “gold” turns into a very shiny piece of pyrite in your display case.